Introduction to React :
React helps developers to build applications by helping
to manage the application state. It’s simple, declarative, and composable.
React is not a traditional MVC framework because React is really interested in
building user interfaces.
React encourages the building applications out of
self-contained, reusable components that only care about a small piece of the
UI. Other frameworks such as Angular also do this, but React stands out because
it enforces a unidirectional data flow from parent component to child
component. This makes debugging much easier.
Introduction to D3:
D3 (Data-Driven Documents) is a
JavaScript library for producing dynamic, interactive data-visualizations. It is
fairly low level, and the developer has a lot of control over the end result.
D3 does mainly four things:
- LOADS: D3 has
convenient methods for importing data from CSV documents.
- BINDS: D3 binds data
elements to the DOM via JavaScript and SVG.
- TRANSFORMS: data can
be adjusted to fit your visual requirements
- TRANSITIONS: D3 can
respond to user input and animate elements based on that input
React with D3:
D3 is great at data visualizations,
but it manipulates the DOM directly to display that data. Rendering DOM
elements is where react shines. Also, once we create a chart component, we can
want to be able to reuse that chart with different data anywhere in our app.
Setting React with D3.js
development environment:
·
For Creating React app, need to use
the following command:
npx create-react-app <your-app-name> in your terminal.
Before we start, you'll
need the below following components:
1) D3 library
2) Editor
3) Web browser
D3 Library:
To create data visualization,
include D3.js library into your HTML webpage. This can be done in two ways:
1) Include D3 library in
your project's folder
2) Include D3 library from
CDN (Content Delivery Network)
Editor:
To write your code use can
use below editors. There are some great IDEs (Integrated Development
Environment) with support for JavaScript like
1) Visual Studio Code
2) Web Storm
3) Eclipse
4) Sublime Text
These IDEs provide intelligent
code completion as well as support for some of the modern JavaScript
frameworks.
Web Browser:
D3 works on all browsers
except IE8 and lower. After setting up the development environment, it's time
to start exploring D3.
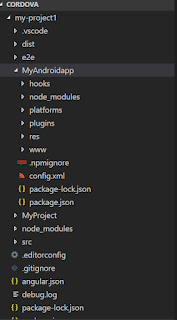
Folder Structure:
Customization of charts:
Create SVG Elements using
D3
SVG provides different
shapes like lines, rectangles, circles, ellipses etc. Hence, designing
visualizations with SVG gives you more flexibility.
D3 Scale provides a
convenient solution. They map our data values that would be better represented
in visualizations.
Method
|
Description
|
d3-scaleLinear()
|
Construct
continuous linear scale where input data (domain) maps to specified output
range.
|
d3-array ()
|
Array
manipulation (array reverse, array sort, array splice)
|
d3-geo()
|
For
geographical projections
|
This is one of the most common approaches to integrate
React and D3:
- Create a Component in React for the charts.
- Call our D3 code on initial load componentDidMount( ) and updates componentDidUpdate( ).
- Import the dependencies from d3 which are used in your
application to create different charts. Some of them are :
import { scaleLinear
} from 'd3-scale'
import
{ max, sum } from 'd3-array'
import
{ select } from 'd3-selection'
import { legendColor
} from 'd3-svg-legend'
·
Install d3 library in the component
npm
install d3
When we import d3 in our
component, the dependencies belonging to d3.js will be added to the component.
Functions
Used:
·
The
d3-select() is
used to select an HTML element from the document. It selects the first element
that matches the argument passed and creates a node for it.
·
The
append() method
appends an HTML node to the selected item and returns a handle to that node.·
The attr() method
is used to add attributes to the element. This can be any attribute that you
will normally add to the HTML element like class, height, width or fill.
·
Under the SVG variable we created, add the following
code:
JSON Data:
Features:
1)
Adding Colors to the bar:
Based on the selecting
different states, added different types of colors and differentiated the map
and bar
2) Mouse-Over:
Implemented events in chart
such as mouse over events. By this event we can identify each map and bar state
color.
Output
screens:


